
About This Generator
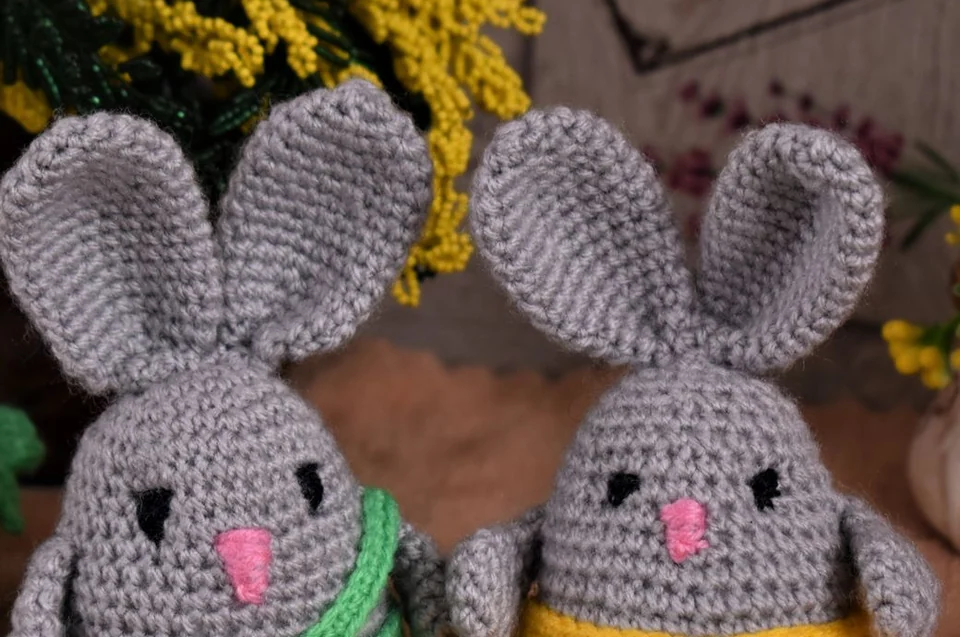
The Amigurumi Face Placement Planner locates embroidered features on an existing head. It uses the head's counted circumference and height to describe classic landmarks or a named embroidery study. Bear, rabbit, cat, penguin, fox, frog and owl studies have distinct feature paths. Closed-eye smile, three-gap comparison and three-expression comparison provide further original choices. It does not generate the head, identify a character from a picture, or sculpt a head from an animal name. Its main purpose is to make spacing decisions explicit before you put permanent stitches into a finished form.
How to Use This Generator
Enter Head circumference in stitches around the region where the face will be placed. Enter Head height in counted rounds, with at least four rounds available for the supported vertical arrangement. Eye spacing is the separation between the two eye positions, measured in stitch positions. Choose values the current validator accepts; spacing must be compatible with an integer, centered pair rather than placing one eye halfway between two numbered positions.
Classic placement retains the original measurements. Named studies require an even circumference of at least twelve, at least eight recorded rounds and an even eye gap from four to circumference minus four. The spacing comparison needs a central gap from six to circumference minus six, leaving room for narrower and wider alternatives. Select only measurements that describe the actual head; changing a style does not silently resize that head.
Use the available colors to compare the existing surface and the feature marks, then choose terminology and Generate. Read the flat placement map together with the written coordinates. The map unwraps the head surface; it is not a camera view of a stuffed sphere. Save a project locally while experimenting, export JSON to preserve the exact measurements, and keep an SVG or printed placement sheet beside the actual head. Restore the original project if you want to compare a second spacing without guessing your first settings.
Understanding the Crochet Pattern
Stitch numbers describe a route around a round. Establish which stitch is the front center before treating any number as a physical location. The continuous spiral's round marker may be at the back or side, so it is not automatically the face center. The planner locates the eye pair symmetrically around the numerical midpoint. On a curved or irregularly stuffed head, equal stitch intervals can still look different from the front. Temporary markers let you inspect the physical result before embroidery.
The feature round and the following rounds are separate vertical locations. A nose one round below the eyes and a mouth two rounds below the eyes need enough existing fabric. Height validation prevents the supported markers from extending beyond the recorded head. It does not establish whether a nose or eye size will look appropriate in a particular yarn.
How the Generator Works
The horizontal center is half the circumference. Half the selected gap is subtracted from that center for the left eye and added for the right. The vertical reference is derived from the recorded head height. Named studies also retain explicit ellipse dimensions, straight path vertices and quadratic curve controls. Fractional positions lie between existing stitch or round markers; they are not partial crochet stitches. Short backstitches follow straight paths, while a curved strand can be laid along the guide and couched in place. A curve control guides its shape and is not another mandatory needle insertion. The head reference must have the stated circumference throughout the featured band; a tapered muzzle needs a separate mapping.
The generated face object retains the eye coordinates, reference round, and gap, while the SVG positions those coordinates on an unwrapped rectangle. Changing the circumference therefore changes both the available surface and the numerical midpoint. This is a placement calculation, not an anatomical simulation.
Step-by-Step Worked Example
Enter a circumference of 24 stitches, a height of 12 rounds, and an eye gap of 6. The midpoint is stitch 12. Half the gap is three, placing the eyes at stitches 9 and 15 on round 6. The nose belongs at the center one round below, on round 7. The mouth is placed two rounds below the eye line, on round 8. Check the arithmetic independently: fifteen minus nine equals six, and each eye is three positions from the midpoint. Put temporary contrasting threads at those locations, look from the front and above, and adjust your intended design before securing embroidery.
Download this worked example as JSON. Restore it in this generator to compare the actual counts and structure.
Practical Tips
Mark the front after temporarily arranging the head and body. Check that both eyes sit on the same actual round rather than on two adjacent spiral turns. Make small, removable test stitches to compare expression. Keep embroidery tension light enough not to dent the stuffed shell. For items intended for young children, embroidered features avoid the detachable small parts involved in some other eye constructions; the planner does not certify the complete toy's safety.
Common Mistakes and Solutions
The face is centered numerically but appears sideways
The numerical route was not aligned with the intended front. Find the assembly orientation and move the temporary center marker before transferring the pair of eye offsets.
One eye is higher than the other
A spiral boundary can be mistaken for a straight horizontal line. Trace the numbered round carefully, count from a known reference, and reposition the temporary marker before embroidery.
A larger gap is rejected
The proposed coordinates may fall outside the usable head or conflict with integer centering. Read the validation message, choose a compatible circumference and spacing, and regenerate instead of forcing a fractional position into the instructions.
Second Reproducible Application
Use this comparison to check how one input changes the amigurumi face placement planner output. Enter width = 24; height = 13; eyeGap = 6. Keep any grid and color data from the downloadable worked example unchanged. Generate again and compare the result with the first example above. The resulting dimensions are 24 stitches around; 13 head rounds. These depend on the entered block size, not a measured finished sample. This comparison was executed with the site's engine; it is a numerical construction check rather than a claim about physical gauge. Save both settings separately if you want to compare them later.
Related Tools and Guides
The Tools directory at /generators/ lists the available generators. Use the linked examples on this page to study the same construction with different inputs, and the Guides directory at /guides/ for supporting reading. Check terminology and measured gauge before combining output from different tools.
Frequently Asked Questions
Does the planner make a bear or rabbit face automatically?
Named studies supply distinct counted embroidery paths, including a triangular bear nose and a lozenge rabbit nose. Ear shape, a projecting muzzle and the underlying head construction remain separate design decisions.
Are the displayed positions centimeters apart?
No. They are stitch positions and rounds on the recorded head. Measure the actual stuffed fabric if a physical distance matters.
Can the map tell me how large to embroider an eye?
It locates a point but does not choose the embroidery width, number of strands, or tension. Test those details on spare fabric or with removable stitches.
Will changing terminology move the features?
No. The coordinates remain the same; terminology affects crochet names elsewhere in the interface rather than the arithmetic of feature placement.
Should I embroider before attaching the head?
Choose an order that allows you to establish the final front and secure thread ends. Temporary assembly can reveal orientation without committing to a permanent seam first.